/embedded_programming
(22_march_2022)
This week of FabAcademy returned to the topic of electronics and computation, this time showing
the basics of programming. During the session, Victor explained the evolution of computers, from
the first huge installations to the microcontrollers based on microelectronics we have nowadays.
Far from being a coding class, this was more of an introduction to the whole environment of
computing and what can be done with programming and code languages. We talked about different
coding languages, flow charts (which seem really visual and interesting to me), INPUTS and
OUTPUTS, conditions and statements and other concepts.
We were also introduced to Arduino (even if some of us had used it before), its Libraries and
its interface and the basics of its coding language, C or C++. I would also have liked to get
some practical knowledge on coding, but it's true that there is plenty of information around
the internet and anyone interested in learning how to code can do it autonomously.
.noise_detection_programme
For this week's task, we had to code a basic program that used at least a LED and a button. In my case, faced the task in another direction since I wanted to do something related to my project.
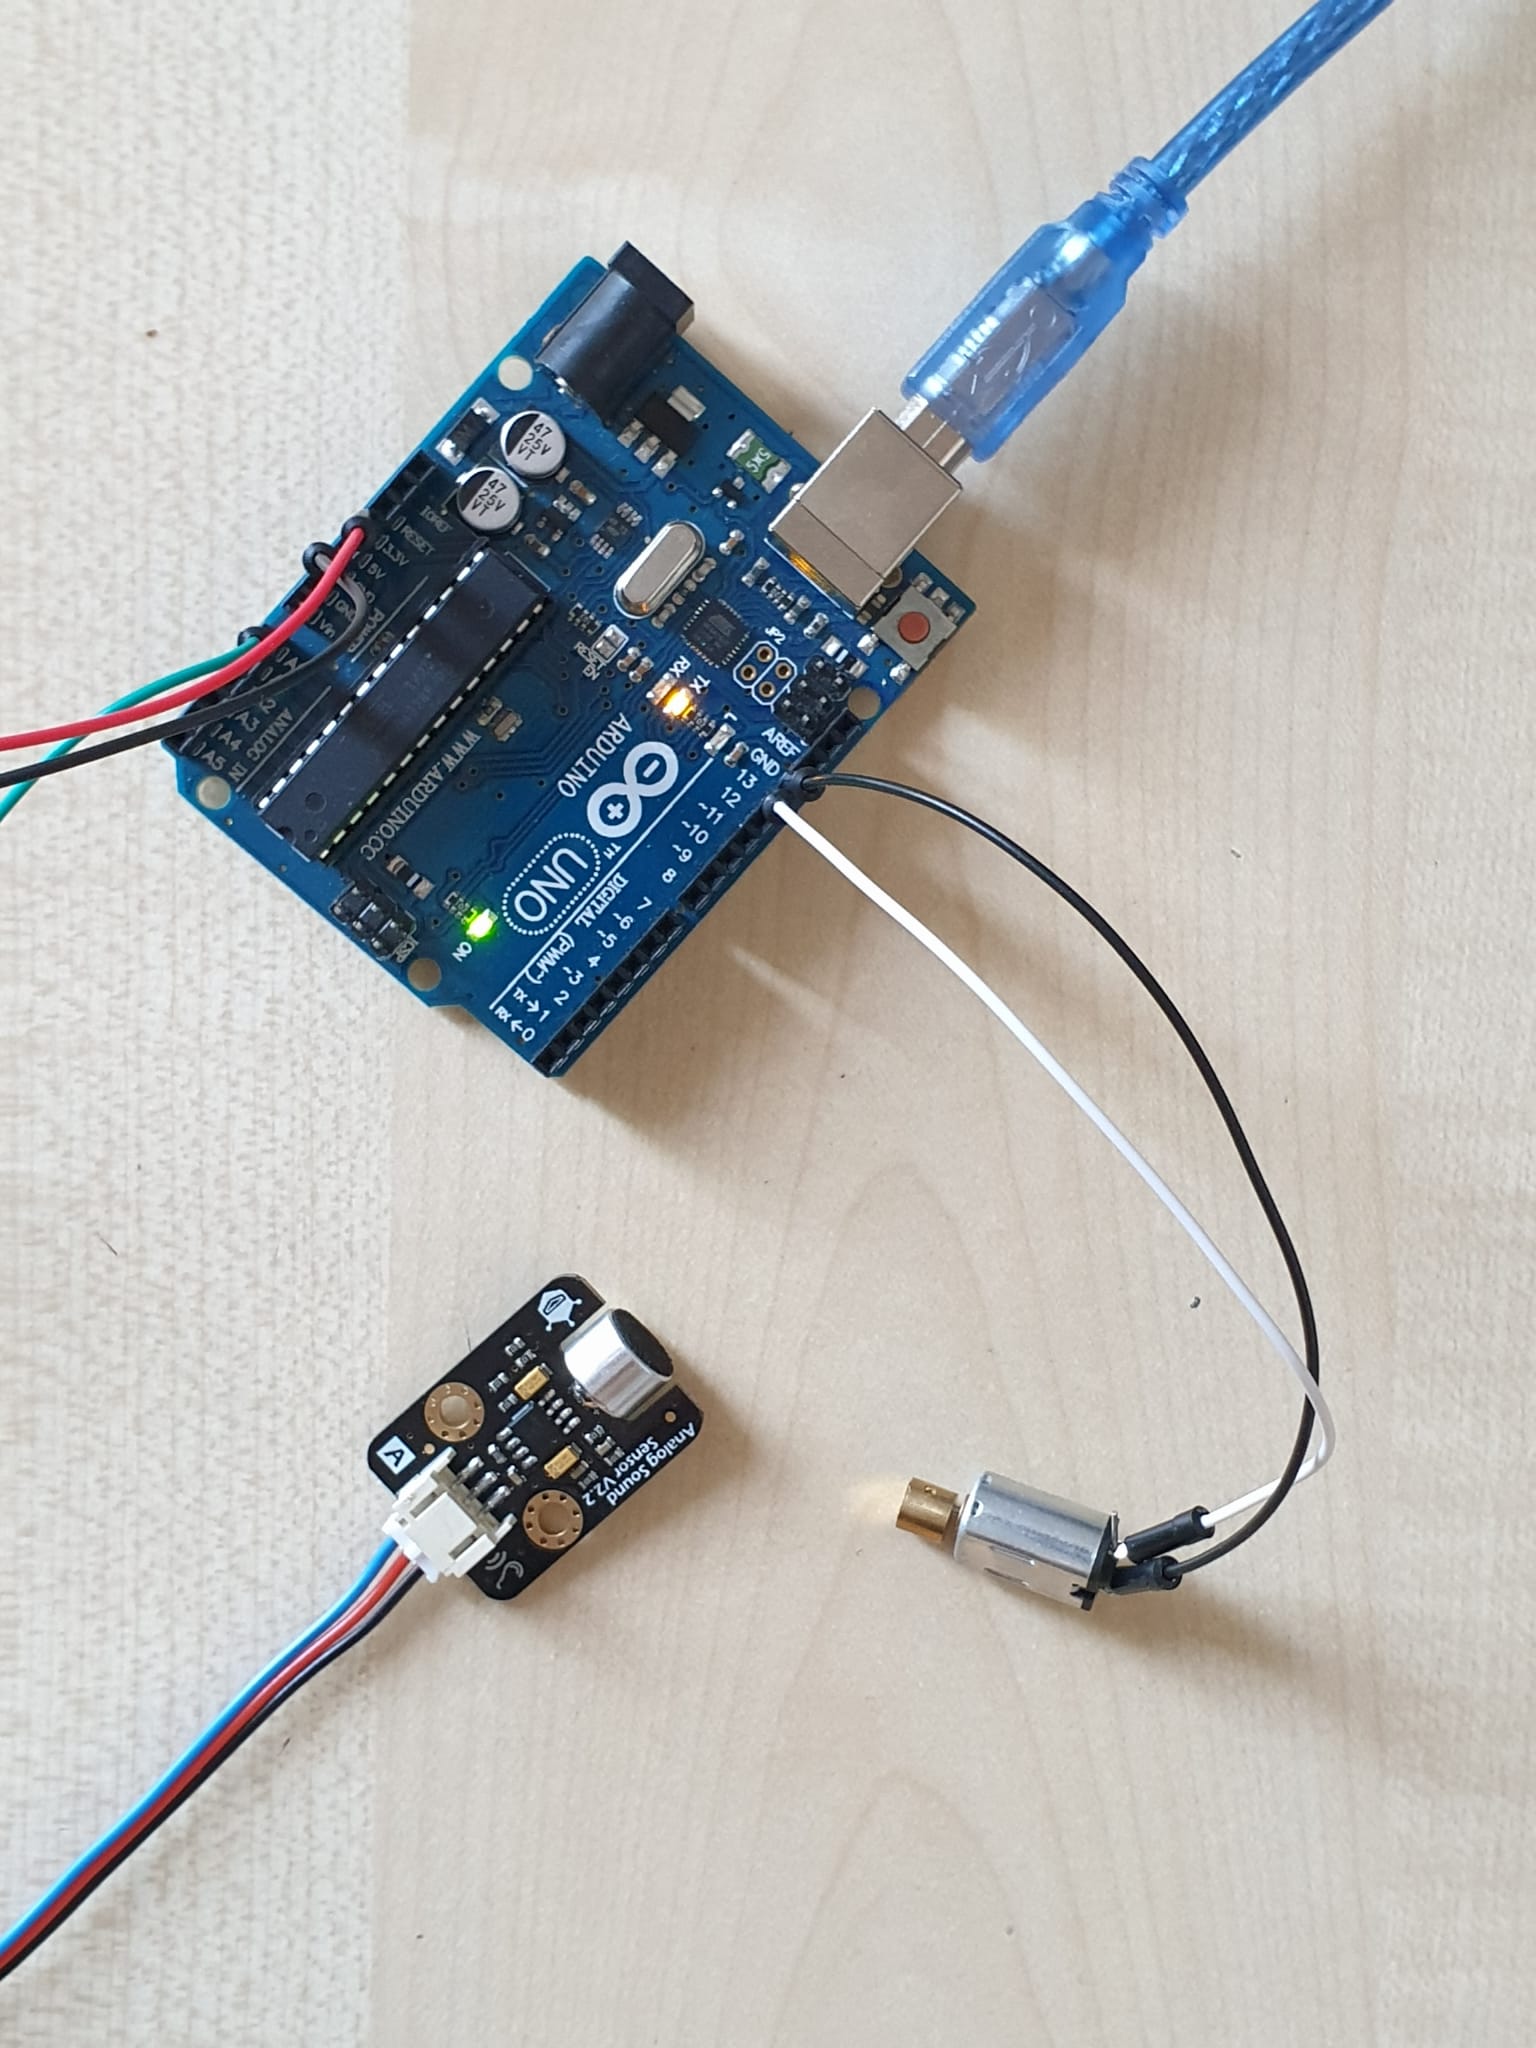
For that, I used an Arduino board, a noise sensor and a small vibration motor to create a programme that made the vibration motor work every time the noise sensor detected a noise higher than 55dB (the value recommended by OMS). This is the flowchart of the programme:

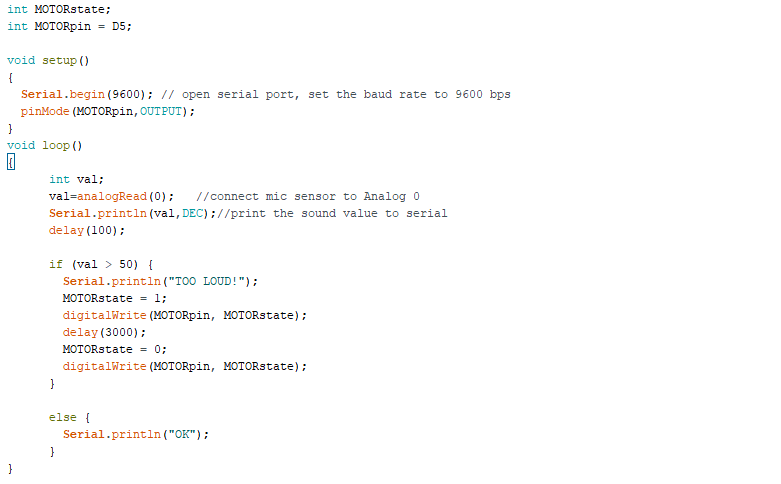
After doing the flowchart, I started looking for the code I needed specifically for that sensor and the motor and generated the code to run the programme properly. There was a part of the code that was already written and another that I had to design from scratch in order to fit my purpose. This is the code for this specific programme:
Finally, I just had to connect the components to the Arduino UNO board. I didn't need a breadboard since all the components were directly connected to the Arduino board and the circuit was really basic. The result of the whole programme looked like this: