/CNC_machining
(15_march_2022)
During this week of FabAcademy, we explored all around CNC milling. This was one of the topics I was
most interested in of the whole FacAcademy since I hadn't worked with it before, and I was looking
forward to doing it. I was really curious to see how the huge CNC machine at FabLab works and also
wanted to be able to cut a design of mine.
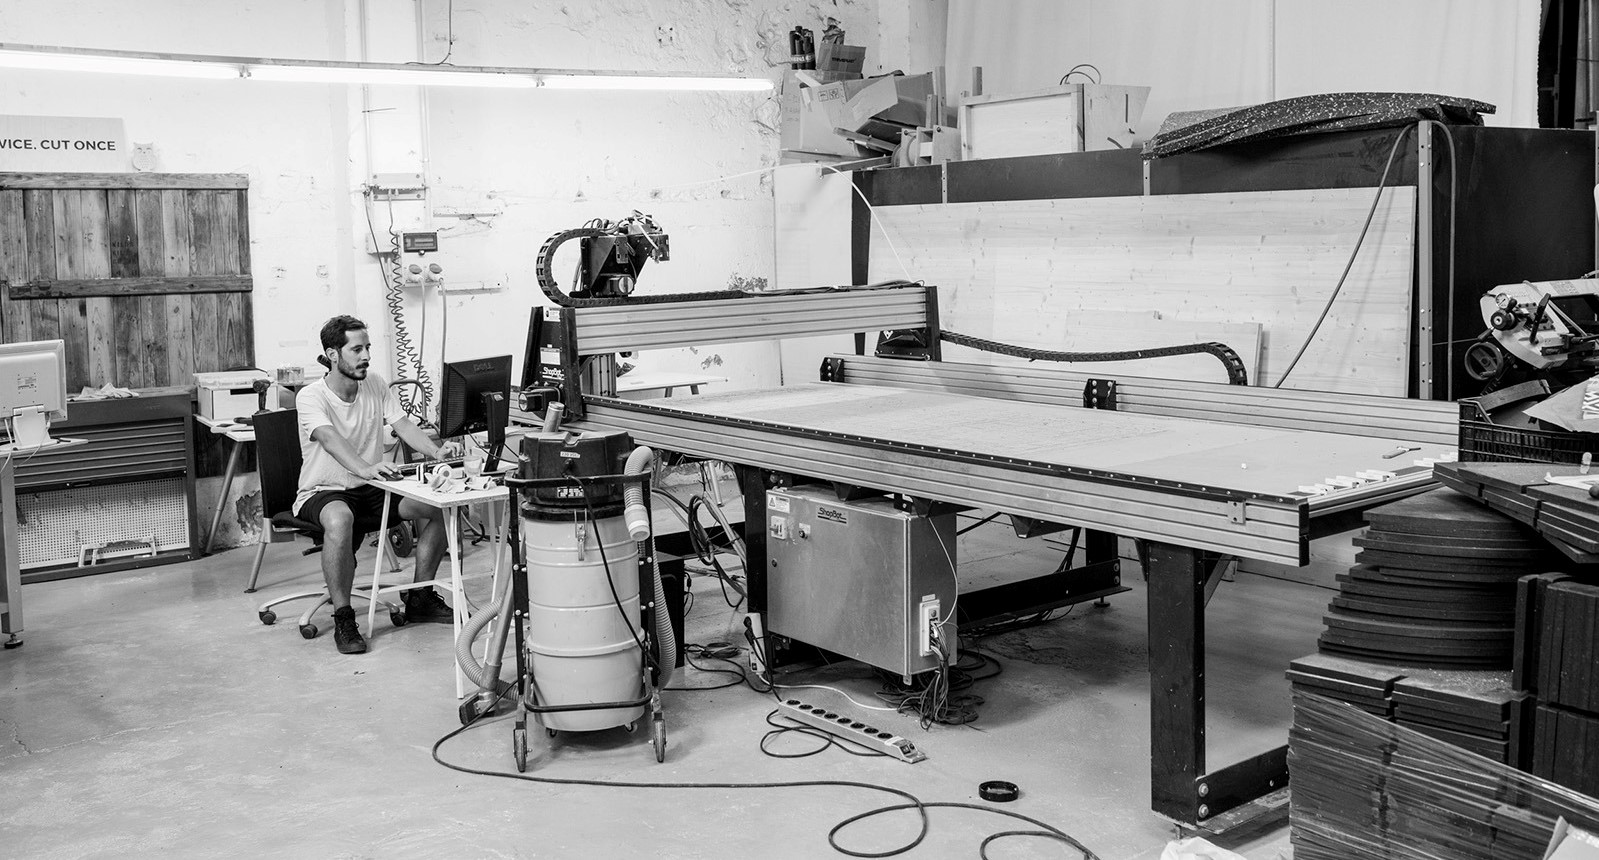
During the session, we had a long explanation of how to use this big tool: the different kinds of
CNC machines, the main parts they have, the process of creating a GCODE for each machine, the things
one needs to take into account when designing, chip load calculation, materials and more.
It was truly interesting to see different applications of CNC milling taking into consideration
that there is an infinity of things one can do with it. Personally, I enjoy seeing objects created
from stacked slices of wood on a big scale and structures created out of modules that have been
CNC cut.
One of the things I would also like to do is to build something in 2.5D using the CNC from FabLab,
exploring the depth and organic shapes. I'm also interested in learning more deeply about CAM
software.
.milling_a_work_table
The task of this week consisted of designing and milling something for the big CNC machine. Each of us had half of a full board of wood (1200x1200mm) to cut whatever we had designed, preferably without screws or glue.
Of course, having this chance of using a CNC to cut something that big is not a thing that happens every day, so I wanted to design and mill a thing that could be useful and meaningful at the same time.
Since my project doesn't really fit with CNC big scale cutting, I decided to create something for my nephew, that we could use for a long time. I am an enthusiast of crafting and hardworking so I decided I could do a small work table for him to start doing things with his own hands (just to put it in context, he is less than two years old).
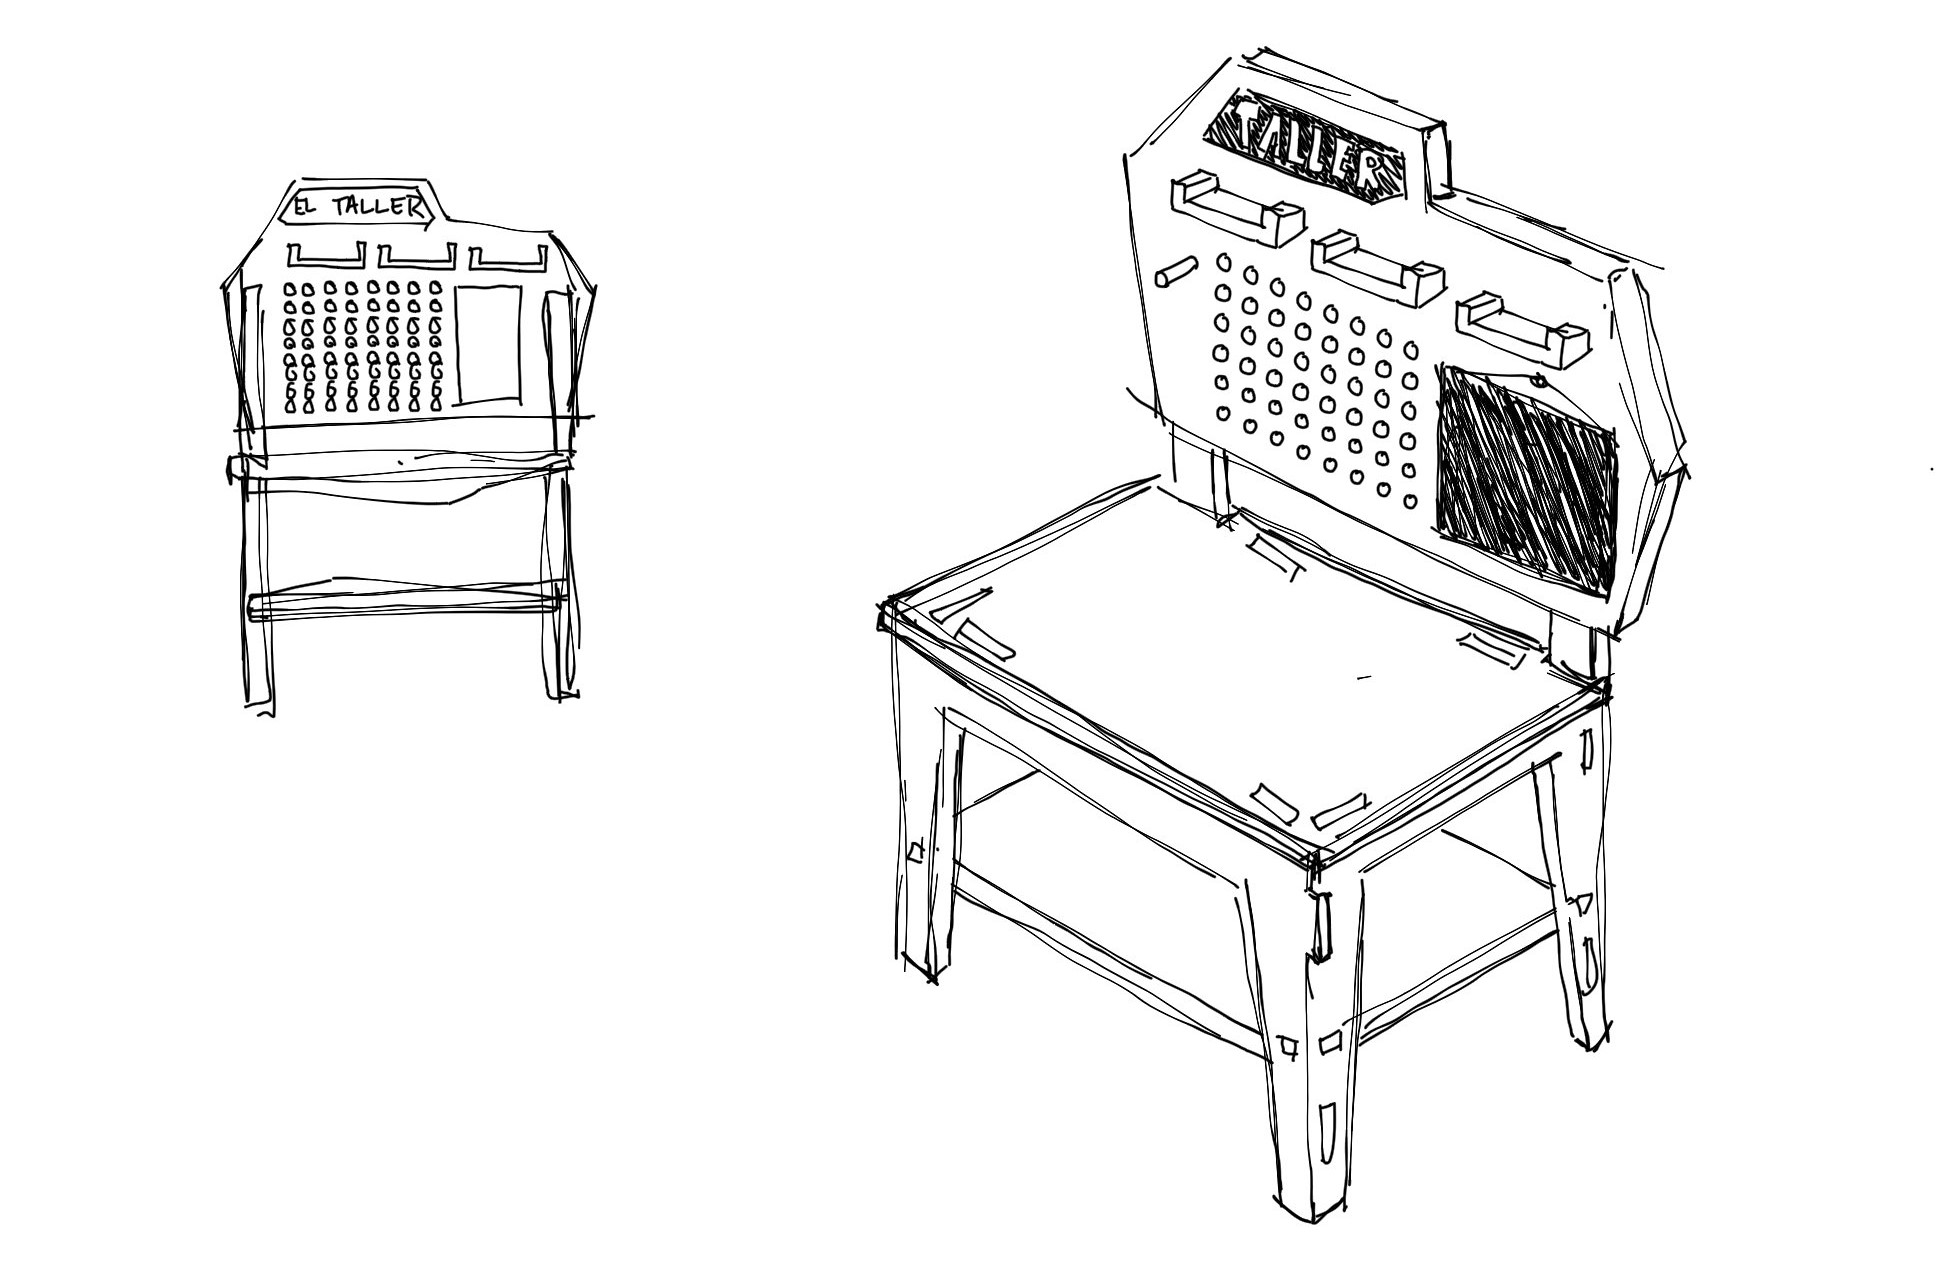
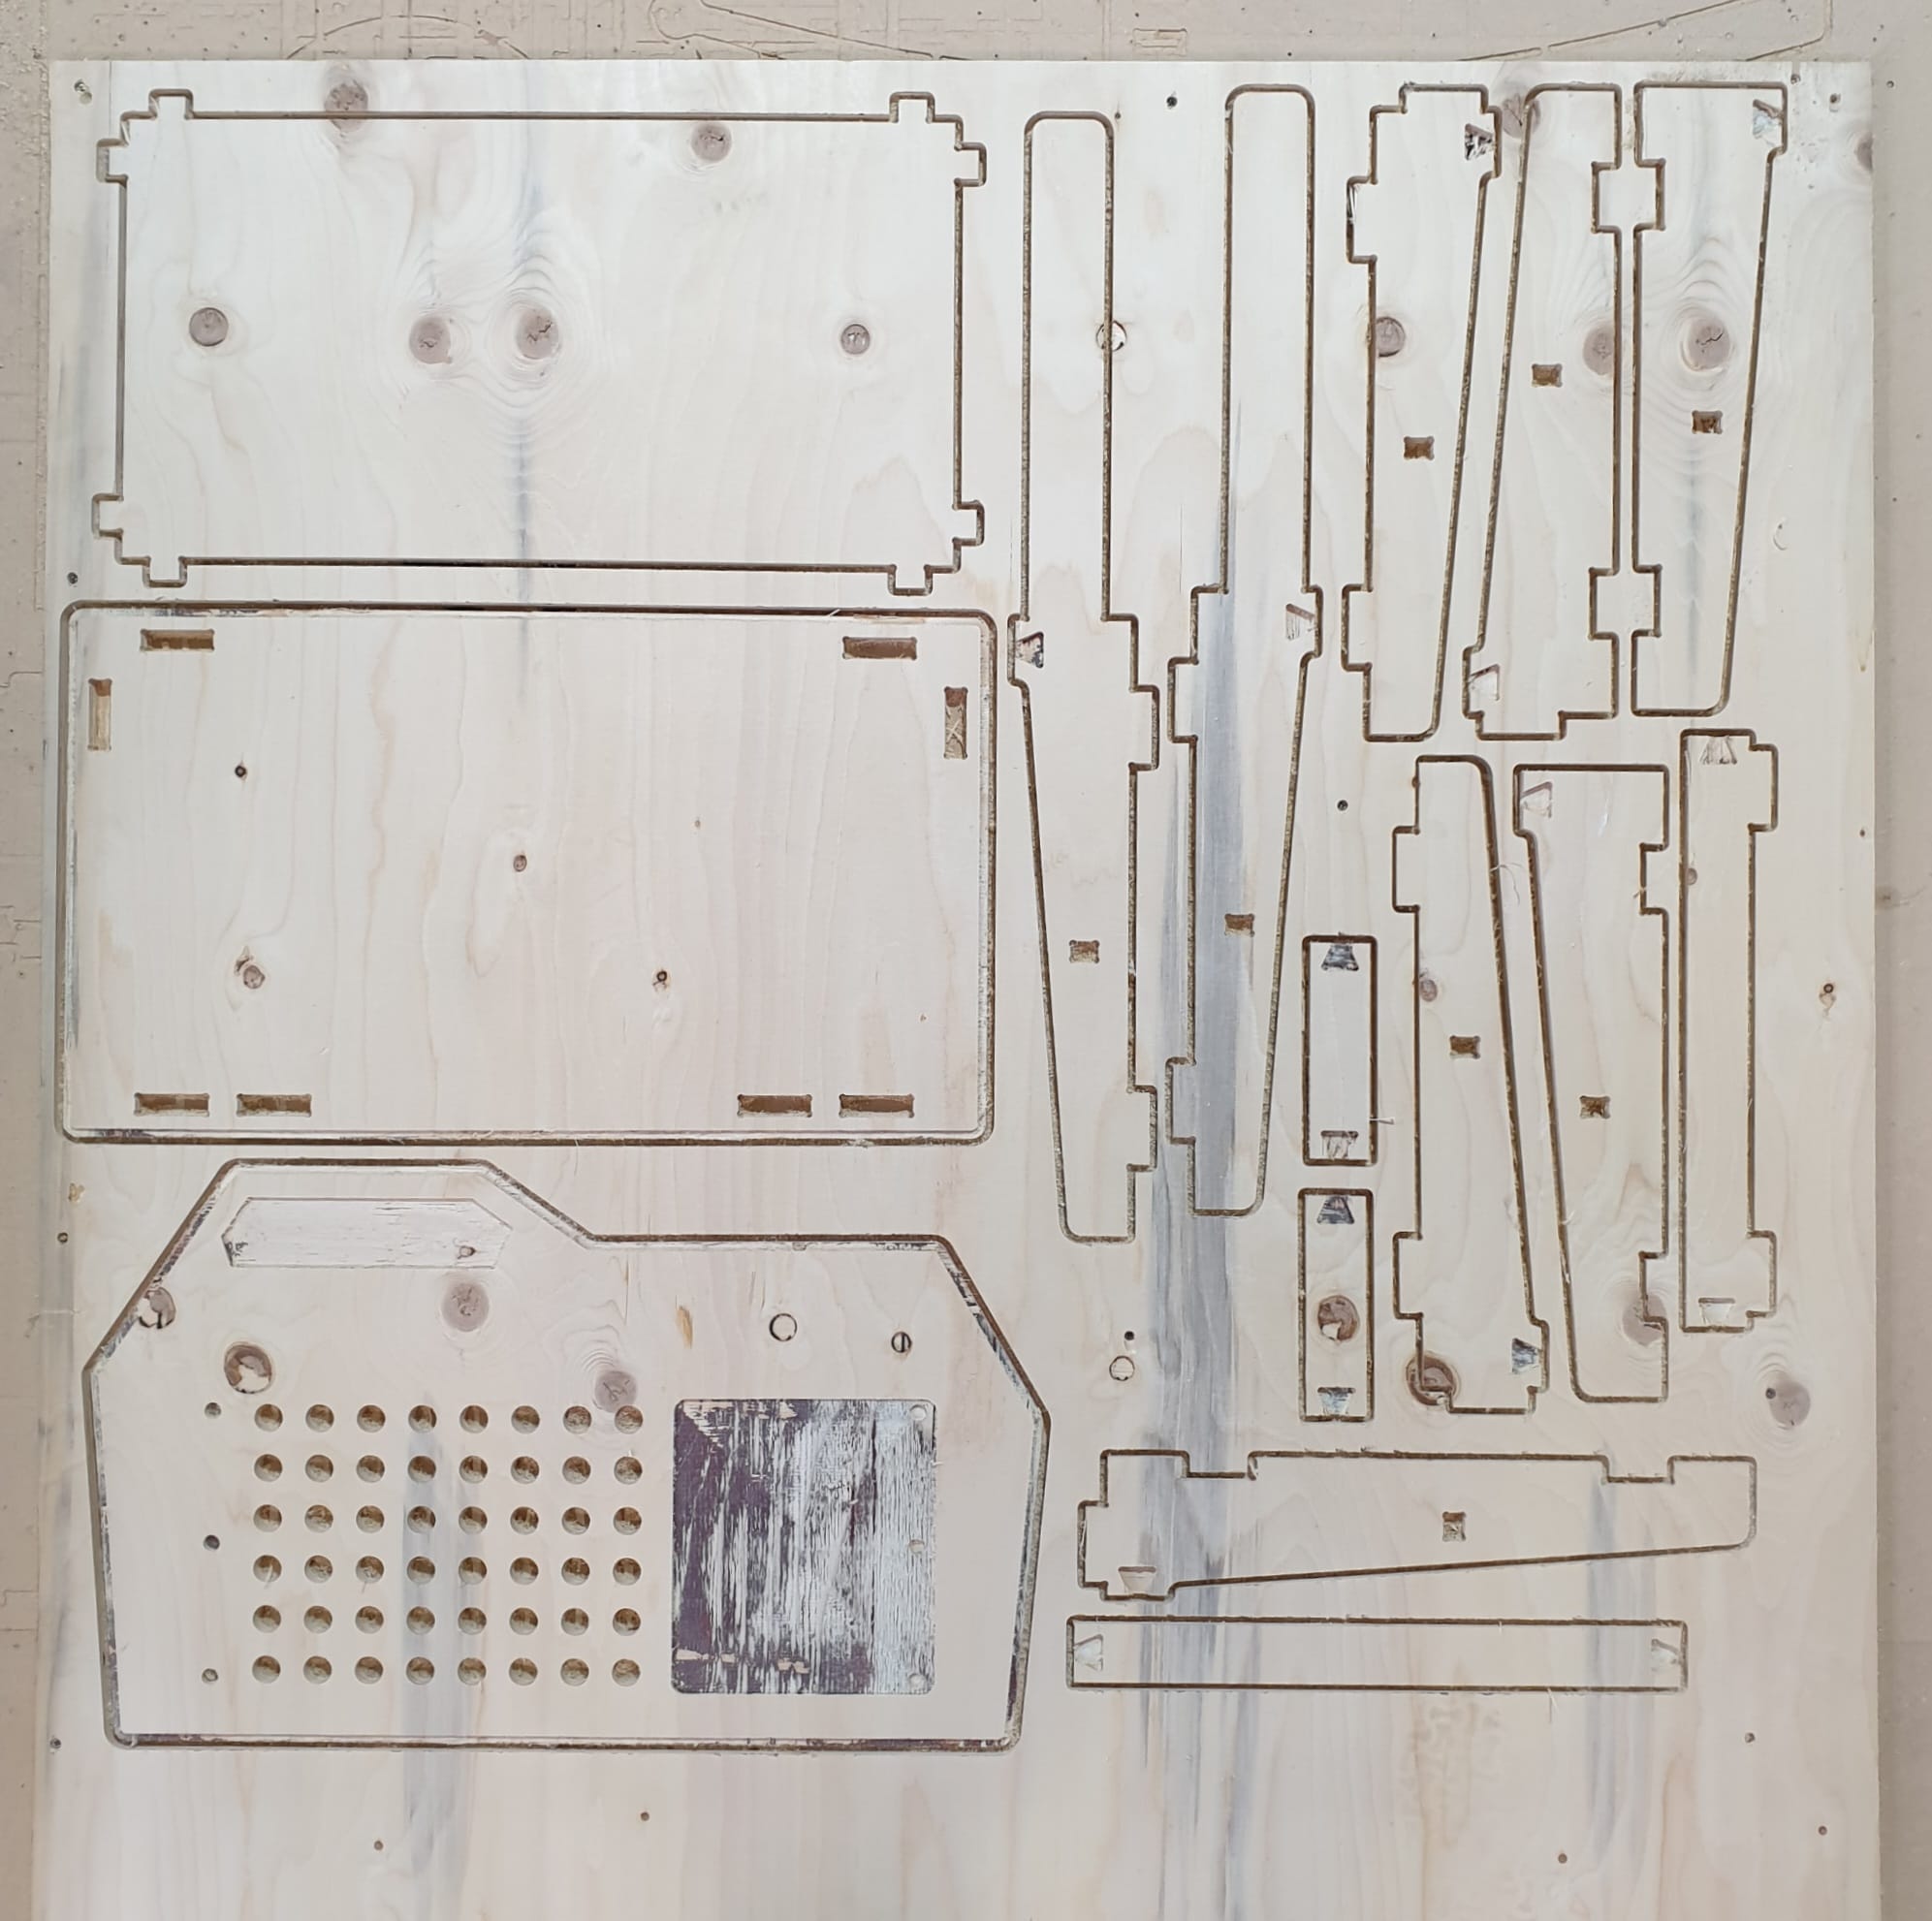
I made some research and then started sketching until I got to this design that looks a bit different from what one can find in the market, but at the same time has all the functionalities the other work tables offer. I was also all the time checking if the parts would fit into the half board, and had to split some of the legs in order to optimise the space.
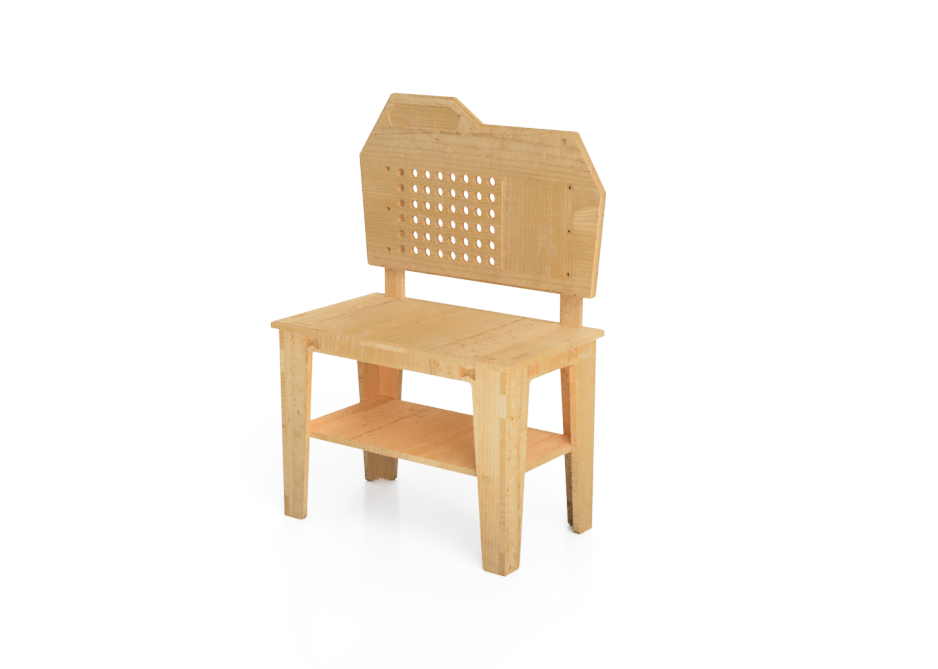
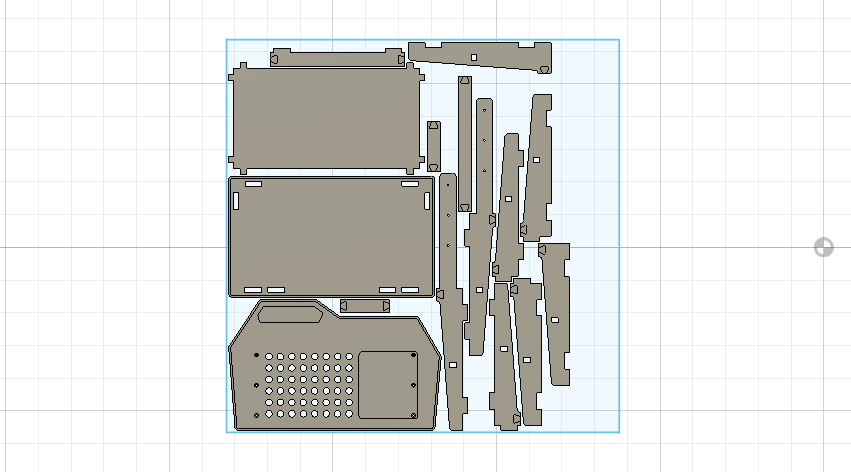
I modelled it on Fusion 360 to make sure everything would fit together and then exported the 2D files. The last step was to create the GCODE, in this case using RhinoCAM. For that, I created two processes: one for the attachment holes and another one for the actual milling of the object. This is how it looked:

Finally, I cleaned each of the parts and assembled the whole body of the work table. This was a bit laborious since after cutting, the borders are not soft enough to directly assemble, so I had to sand each one of them. This is how the wood board looked after the cut:
And finally, this is the workshop table assembled with the 3D printed joints. As you can see the surface of the wood is not smooth because the wood wasn't of a good quality, but I'll fix this out by laser cutting some MDF sheets to stack over the wood and give it a better look in the end.
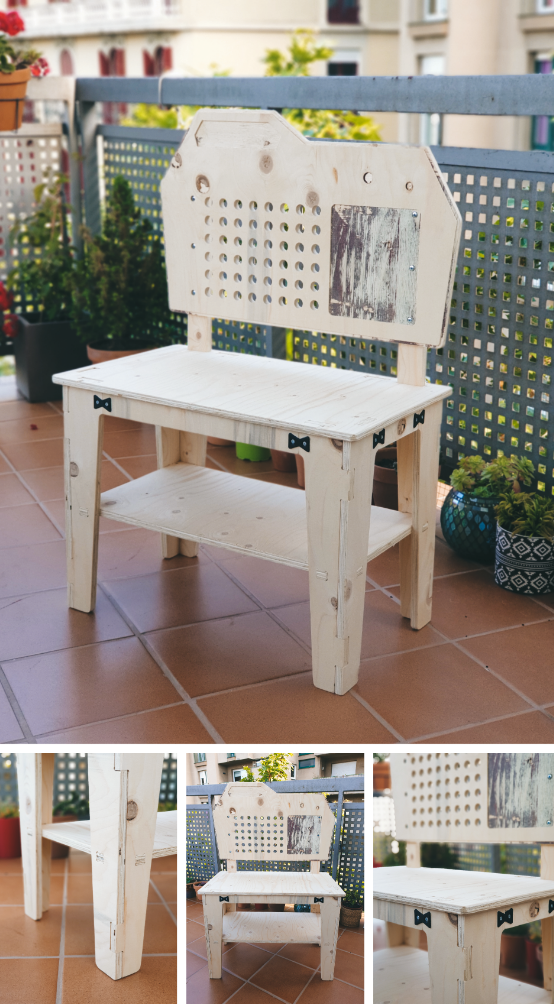
However, this is still a work in progress and I will add more things to this work table. I want to 3D print some parts and laser cut some others to complement the CNC cut. Hopefully, I'll have the final design ready someday...